The Left Handed Calligrapher contains affiliate links and is a member of the Amazon Services LLC Associates Program. If you make a purchase using one of these Amazon links, we may receive compensation at no extra cost to you. See our Disclosure Policy for more information.
This post was first published in 2018. The contents have been updated recently to include more information I have learned with recent projects.
I had to learn how to write on macarons last valentines day and thought I would share what I learned with you!
It took some trial and error to find the right supplies. I tried the cookie markers in multiple brands, I tried the food safe pens, I tried all sorts of icing and gel substances but nothing really gave me the look of “calligraphy on cookie” like actually doing calligraphy on the cookie. I’ve linked to the products I found to be successful in easy of use and color opacity, you can visit my amazon shop to find all these items and more calligraphy items I recommend.
So this will be the first of a few “how to” posts I have planned for the year. Hope you enjoy!
HOW TO WRITE ON MACARON:
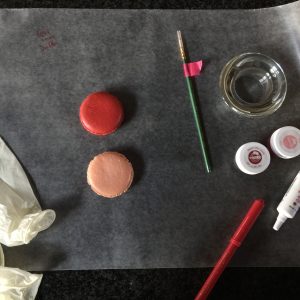
1. Gather your supplies. You will need: Fresh Macaron cookies, Gloves, clean fine tipped brush (not one you use with calligraphy ink!), icing color, a little bit of clean water or vodka, plate or wax paper, steady hand.
2. Plate a bit of your ink and test. Not all ink works the best. You can see in the photo above that I have a marker, some gel edible ink and then pots of ink. I found that I like the pots of ink the best for the bold coverage I wanted. Sometimes you also need to mix a drop of water (and I do mean 1 drop) with the icing color to make it flow on your brush for calligraphy. I liked the brush the best to not crack the delicate shell of the cookie.
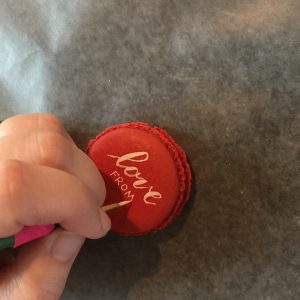
3. Keep your cookies in the refrigerator until you are ready to write on them. I cycled through about 10 at a time to keep them chilled and not spoil or go soft on me. (I’m not wearing a glove in this photo because I had already cleaned up and forgot to take an “in progress shot” – but please do wear gloves if you are serving to people for consumption).
4. Use a very light touch to work on the cookie shell. They can easily be punched through and that is an expensive mistake. I love the way the brush turned out better than the marker. You can use this method with any color and mix custom colors with the little pots of ink.
Also, I would like to note – this is a small surface area, it is more impactful to keep the design simple. One word or 2 with some capitals mixed in with your calligraphy is definitely the way to go. It was tough to fit all this on the little cookies.
5. I allowed my calligraphy to dry for 2 hours after writing on the macaron. This helped prevent the “ink” from transferring from one cookie to the other when stacked.
6. Serve and watch people be in awe of your amazing work.
HOW TO USE GOLD ON MACRONS:
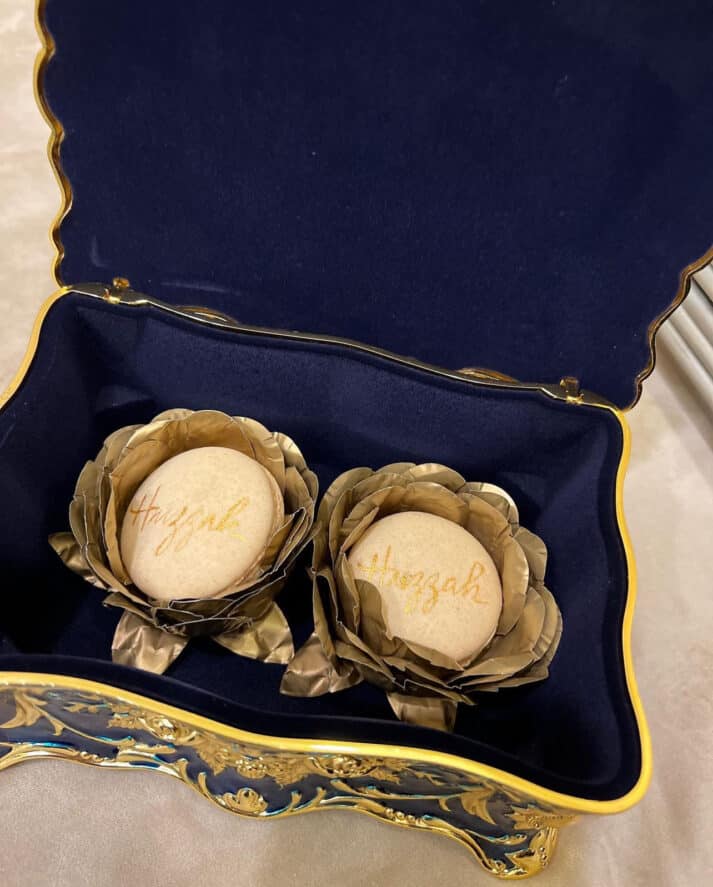
More recently, I was asked to write in gold on Macron cookies for a baby shower. I’m updating this post to share what I learned working with gold.
First, the gold is a powder so it works a little different than the “ink” we would use previously. Here you want to mix the gold with vodka to make it into a liquid paint. The vodka is food safe and evaporates quickly, just leaving the gold behind. When mixing, a little of each is used. I prefer a darker more opaque gold, so I used just a little liquid to powder ratio. Since the vodka evaporates, you will need to add as you work to keep it in a liquid state.
Again, I tried all the supplies. This was a last minute request so I searched my local shops but the options were limited. You can find the same gold powder I used on Amazon (where I ended up getting it shipped overnight).
The process was the same. Clean surface area, clean new brush, gloves, mask, a palette for my gold ink and patience. They turned out really well and I look forward to more projects like this!
Hope you enjoyed this little how to. I have a few more planned throughout the year so keep checking back in and creating with calligraphy. Also, I’m still figuring out how to get a video on my blog… but until then, I do have a short video on my instagram of me writing these so you can see it all in action. Thanks!


Alessandra says
Hi!! Very nice your post!! Thanks a lot! One question, did you try to store again in the refrigerator after write?
Or just serve ?
I tried only one time, but after 1 day leaves in a box In the fridge, the inch goes the the hands
nicole says
Hi! Yes, absolutely. I kept them in the refrigerator until they were served except for the 5 or 10 minutes I wrote on them. I also wrote in batches so not many were out at one time.